
- Log in to the Azure portal at https://portal.azure.com ➢ navigate to the Azure Synapse Analytics workspace you created in Exercise 3.3 ➢ on the Overview blade click the Open link in the Open Synapse Studio tile ➢ select the Manage hub item ➢ click Upload in the Workspace Packages section ➢ upload the brainjammer.whl file downloadable from the Chapter03/Ch03Ex05 directory on GitHub at https://github.com/benperk/ADE ➢ choose the Apache Spark Pools menu item ➢ hover over the Spark pool you created earlier ➢ select the ellipse (…) ➢ select Packages ➢ select the Enable radio button under the Allow Session Level Packages section ➢ in the Workspace Packages section, click + Select from Workspace Packages ➢ check the box next to the brainjammer.whl package (if the package is not there, wait; it is likely still being applied) ➢ be patient ➢ click again on the ellipse (…) ➢ once the .whl file is visible (see Figure 3.42), also consider clicking the notification bell at the top of the page and look for a Successfully Applied Settings notification.
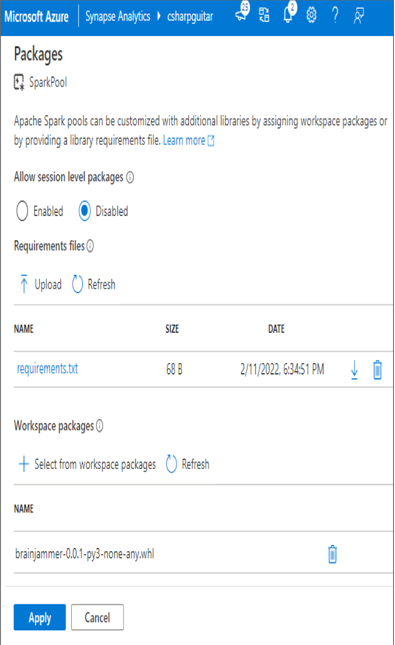
FIGUER 3.42 Adding a workspace package in Azure Synapse Analytics
- Select the Develop hub link ➢ click the + ➢ select Notebook ➢ in the Attach To drop‐down box, select your Spark pool ➢ enter the following code snippet into the command window ➢ run the command:
import pkg_resources for d in pkg_resources.working_set: print(d) - The results show brainjammer 0.0.1 in the list of packages available on that instance. Enter the following snippet to execute the code in the csharpguitarpkg package. Figure 3.43 shows the output.
from csharpguitarpkg.brainjammer import brainjammer brainjammer()
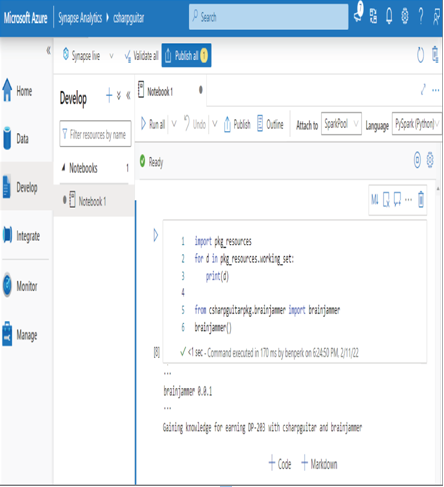
FIGUER 3.43 Consuming a workspace package in Azure Synapse Analytics
Configuring the workspace is a very powerful aspect of the platform. As long as your custom code runs with the default installed comments, you can run just about any computation. You are limited only by the limits of your imagination.
You might have noticed the requirements.txt file in Figure 3.42. That file is useful for managing versions of Python libraries that run in a pool. For example, numpy 1.19.4 is currently installed on the pools, as you can see by running the pkg_resources.working_set method in the Spark pool notebook. If you were to add numpy==1.22.2 to the requirements.txt file you created in the previous exercise and upload it, then that version of the library will be downloaded and installed on the pool instances from that point on. You can confirm this by running pkg_resources.working_set again after the change has successfully been applied.